Connect via Presto CLI
This page will help you download and configure the Presto command-line interface (CLI) to query your Presto Clusters. The official Presto CLI documentation can be found here.
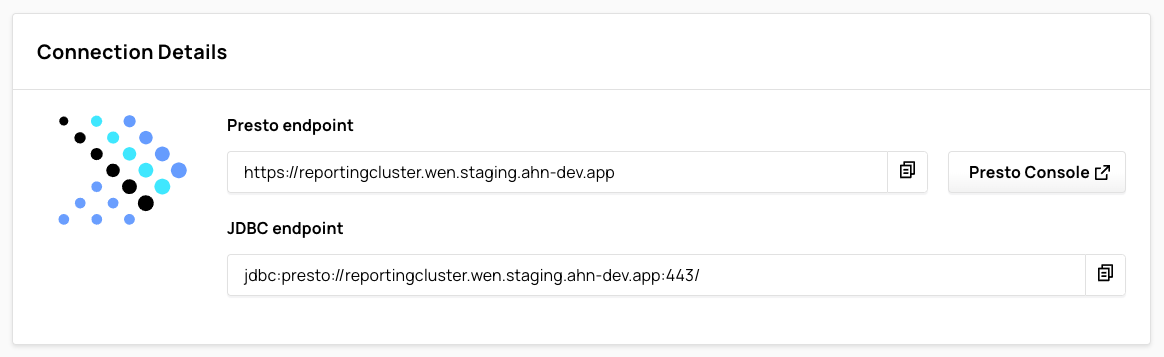
Step 0: Identify your Presto cluster version and endpoint
This step is for Ahana Cloud for Presto.
- Log into your Ahana Cloud SaaS Console.
- Go to Clusters.
- Make note of the Presto cluster version and endpoint under the Information and Connection Details section, respectively.
- You will also need your Presto cluster username and password.
Step 1: Download the Presto CLI executable JAR
- Navigate to the Presto CLI build artifact page for your Presto version (or higher). The Presto CLI build artifacts are hosted at: https://repo1.maven.org/maven2/com/facebook/presto/presto-cli/ with a distinct directory for each Presto version. For example, if you wanted the 0.251 Presto version, you would navigate to https://repo1.maven.org/maven2/com/facebook/presto/presto-cli/0.251/.
- Download the executable JAR. This file is called
presto-cli-{version}-executable.jar.
Step 2: Rename and make executable
The CLI is a self-executing JAR file.
- For convenience, rename your executable JAR to
presto. - Make the JAR executable with
chmod +x presto.
You will need a Java Runtime Environment (JRE) on your local machine to to run the CLI. Make sure you have at least Java 8 or higher installed on your local machine.
Step 3: Connect to your Presto cluster
- Using your Presto cluster endpoint and username, you can connect the Presto CLI to your cluster with the following command:
./presto --server https://reportingcluster.my-domain.cp.ahana.cloud --user Admin --password
You will be prompted for your password.
A successful connection with show you a Presto command line prompt:
presto>. You can now submit queries to your cluster. For example:
presto> show catalogs;
      Catalog
--------------------
 ahana_hive
 jmx
 system
 tpcds
 tpch
Connect with an Identity Provider
To query your Presto cluster with the Presto CLI with an identity provider, you will need:
- an identity provider. See Add an Identity Provider.
- a version of the Presto CLI that supports the identity provider authentication. See Identity Provider in Presto Cluster Overview.
- the Presto endpoint of your Presto cluster. See Connection Details.
- the email address of the user parameter of your identity configured in your identity provider.
To start the Presto CLI, run a command similar to the following:
./presto --external-authentication --server https://reportingcluster.my-domain.cp.ahana.cloud --user oidc-identity
--external-authentication, --server, and --user are all required.
Use the Presto endpoint of your Presto cluster for the URL following --server in the example.
Substitute the email address of the user parameter of your identity configured in your identity provider for oidc-identity.
When you submit a query such as show catalogs;, the authentication process begins and the Presto CLI interacts with your identity provider. If you are not currently logged in to your identity provider, the log in page for your identity provider opens in a web page. The Okta log in window is provided as an example.

Once logged in to your identity provider, the web page will show your authentication was successful similar to this example:

At the presto> prompt of the Presto CLI, your query will have completed.