Add an Identity Provider
note
To enable identity providers in Ahana, contact Ahana Support.
Adding an identity provider affects all Presto clusters in the Ahana Compute Plane created after the identity provider is added. Existing Presto clusters are not affected. To enable the identity provider for an existing Presto cluster, delete the Presto cluster and recreate it. See Delete a Presto Cluster and Create a Presto Cluster.
To add an identity provider definition in Ahana:
In the Ahana SaaS Console, select Security, then select Identity Provider.
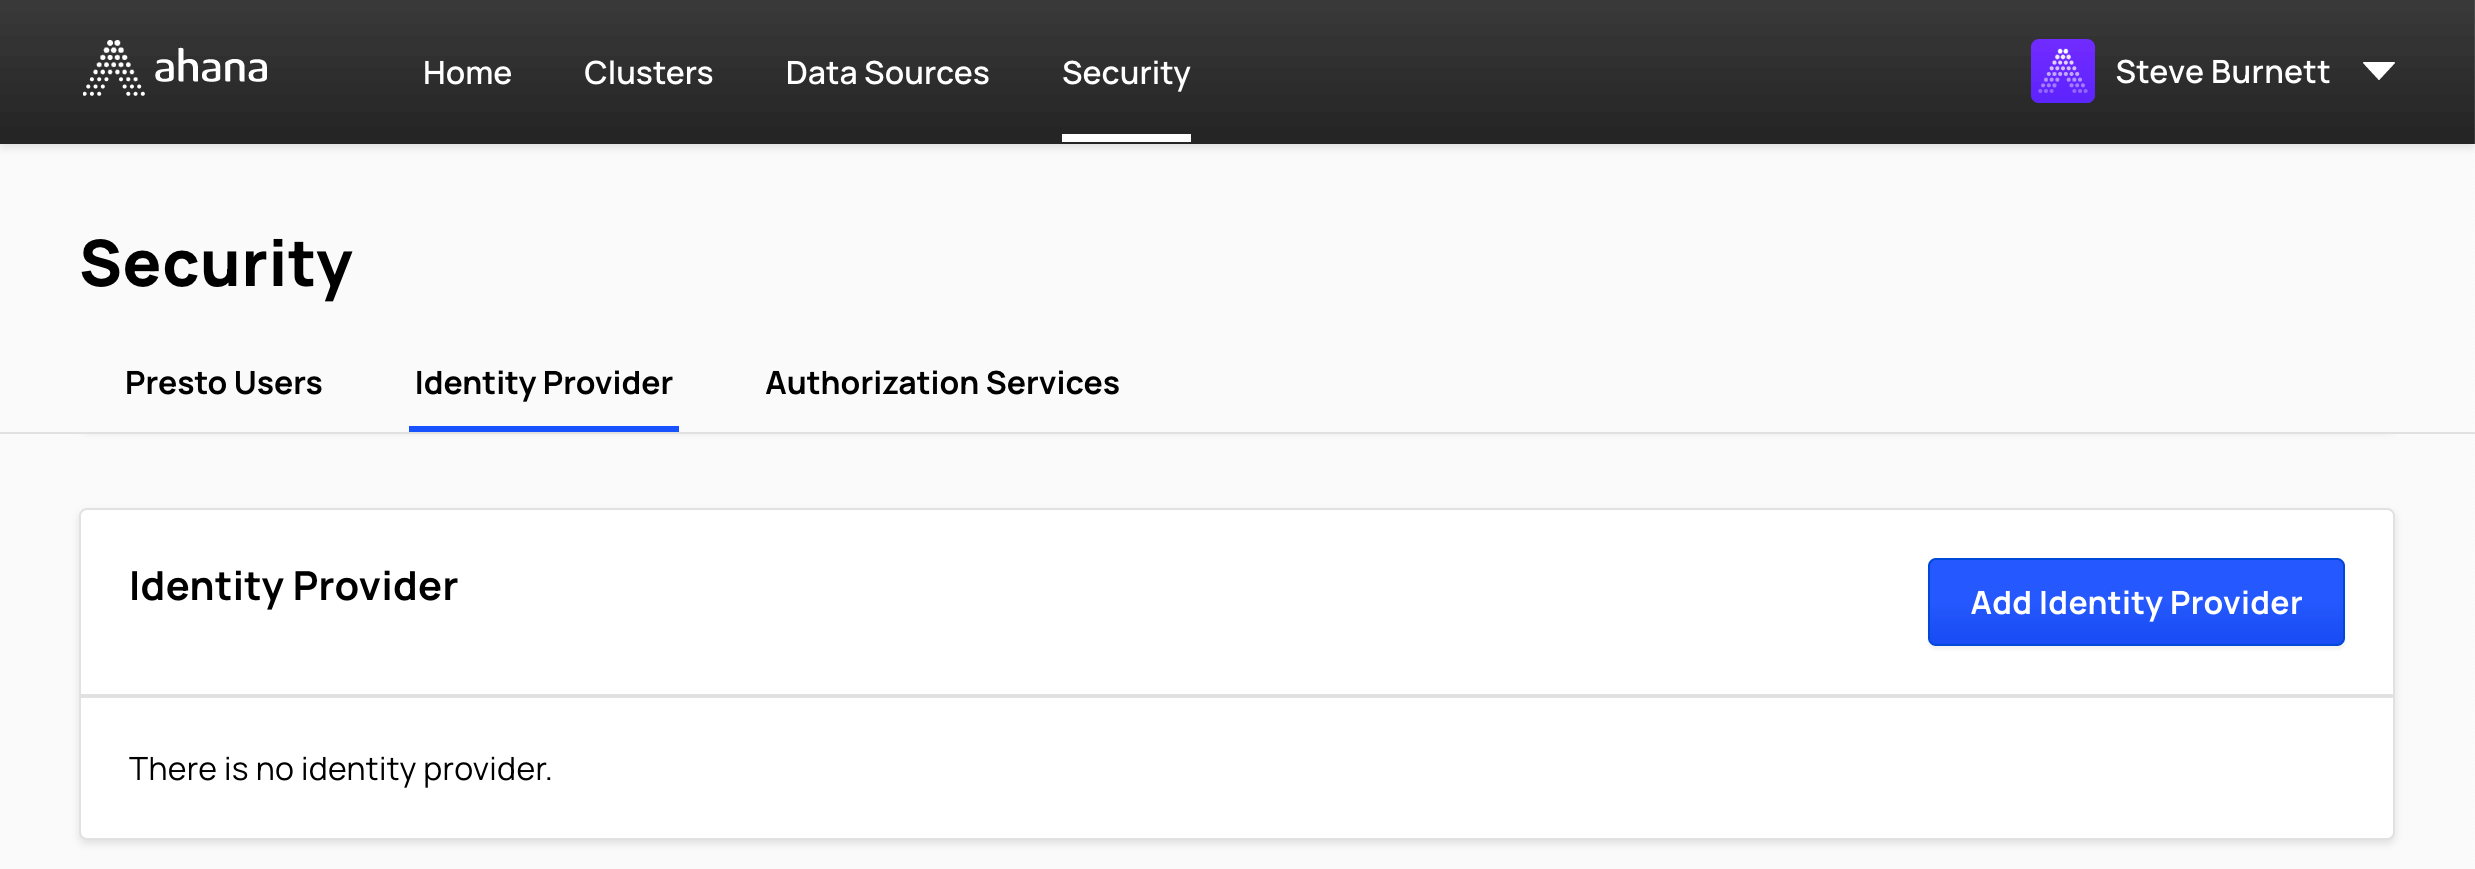
Select Add Identity Provider.
Select OIDC.
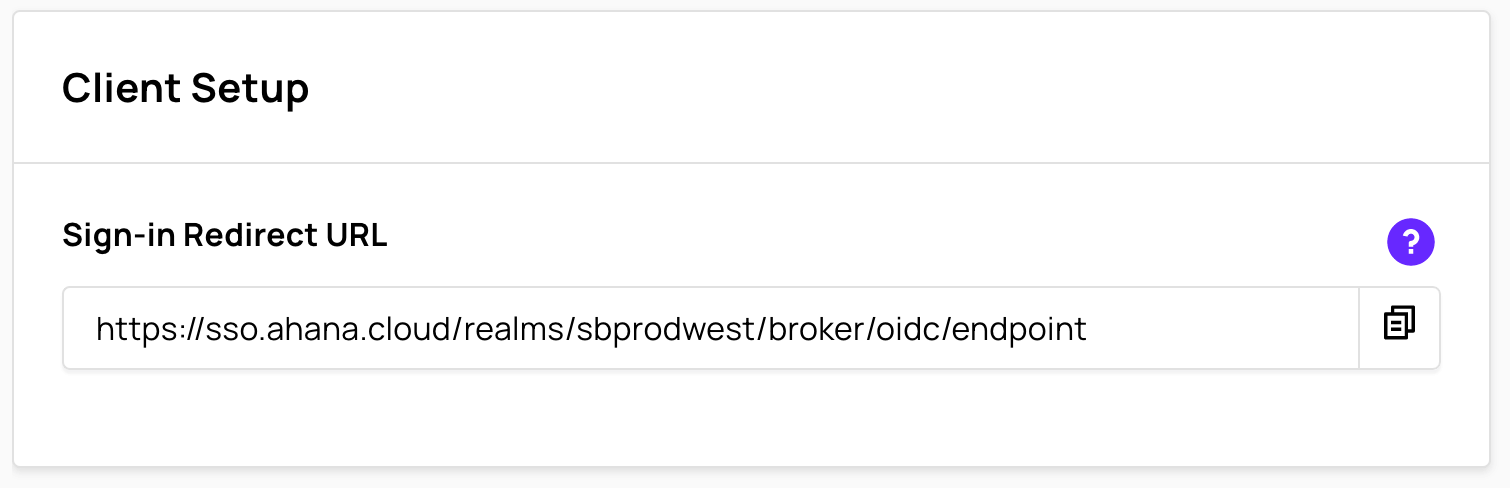
Copy the Sign-In Redirect URL and use it to configure your identity provider.
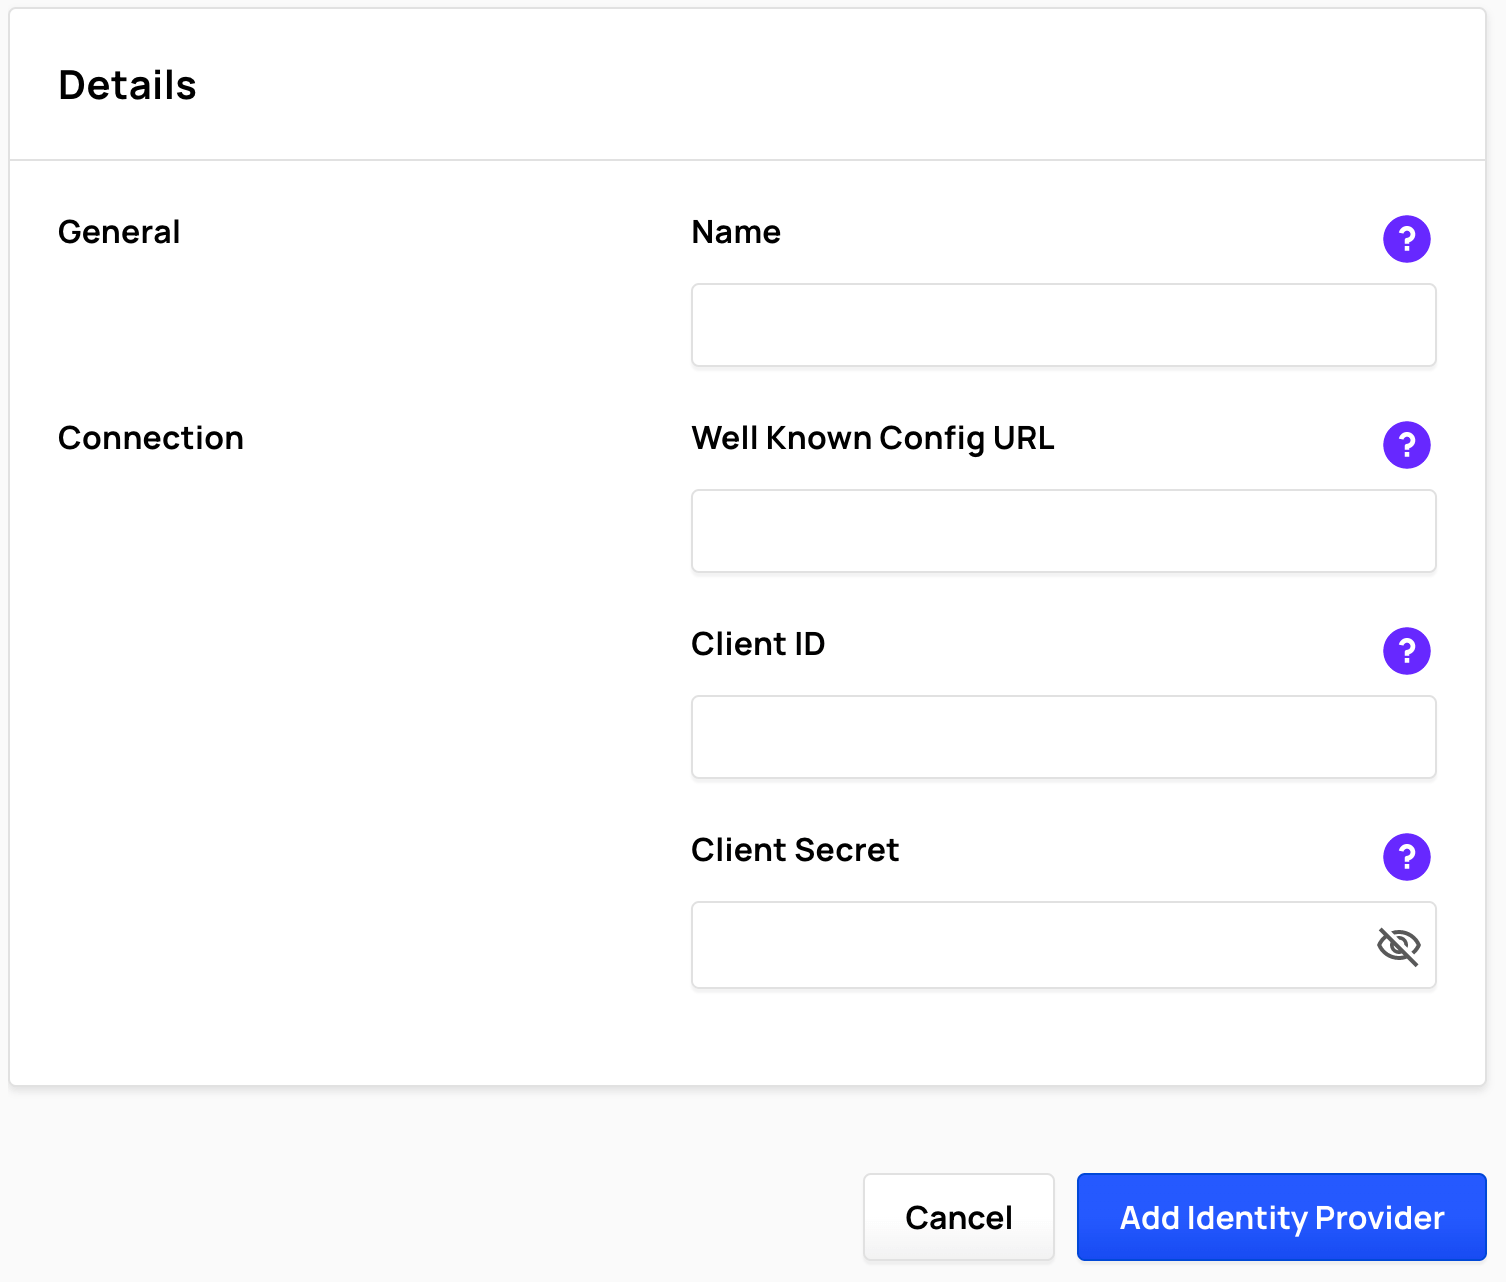
Enter a Name. The name must be unique across your Ahana Compute Plane. Ahana recommends a descriptive name to help you identify the integration in your identity provider.
In Well Known Config URL, enter the appropriate URL.
For example, to create the Well Known Config URL using Okta as the identity provider:
In Okta, select Security, API, Authorization Servers, then select the authentication server for Ahana.
In Settings, copy the Metadata URI. The Metadata URI will be similar to this example:
https://account.okta.com/oauth2/default/.well-known/oauth-authorization-serverEdit the URI by deleting everything after
account.okta.com/and adding.well-known/openid-configurationto the end. The result will be similar to this example:https://account.okta.com/.well-known/openid-configurationIn Ahana, enter the edited URL into Well Known Config URL.
Enter the Client ID and Client Secret that was generated from your identity provider configuration.
Select Add Identity Provider.

In the confirmation dialog, select Add Identity Provider.