Set Up the Ahana Compute Plane
This page presents how to provision your Ahana Compute Plane in your AWS account using CloudFormation templates. Use the CloudFormation templates to grant Ahana cross-account access by creating a new AWS IAM role in your AWS account, using the Ahana account ID and custom external ID.
See Prerequisites for the required prerequisites to provision an Ahana Compute Plane.
note
To manually create a new IAM Role and Policies, see Manual Setup of the Ahana Compute Plane.
The Ahana Compute Plane requires several AWS services such as Amazon Elastic Kubernetes Service, S3, and others. To provision these resources, the AWS role that Ahana assumes must have policies that allow Ahana to orchestrate and deploy the needed resources in your AWS account.
tip
The contents of the policies are available at Ahana AWS IAM Policies.
Create a new AWS IAM Role
For information about the role you are creating in this task, see Ahana Provisioning Role.
- Log in to the Ahana SaaS Console.
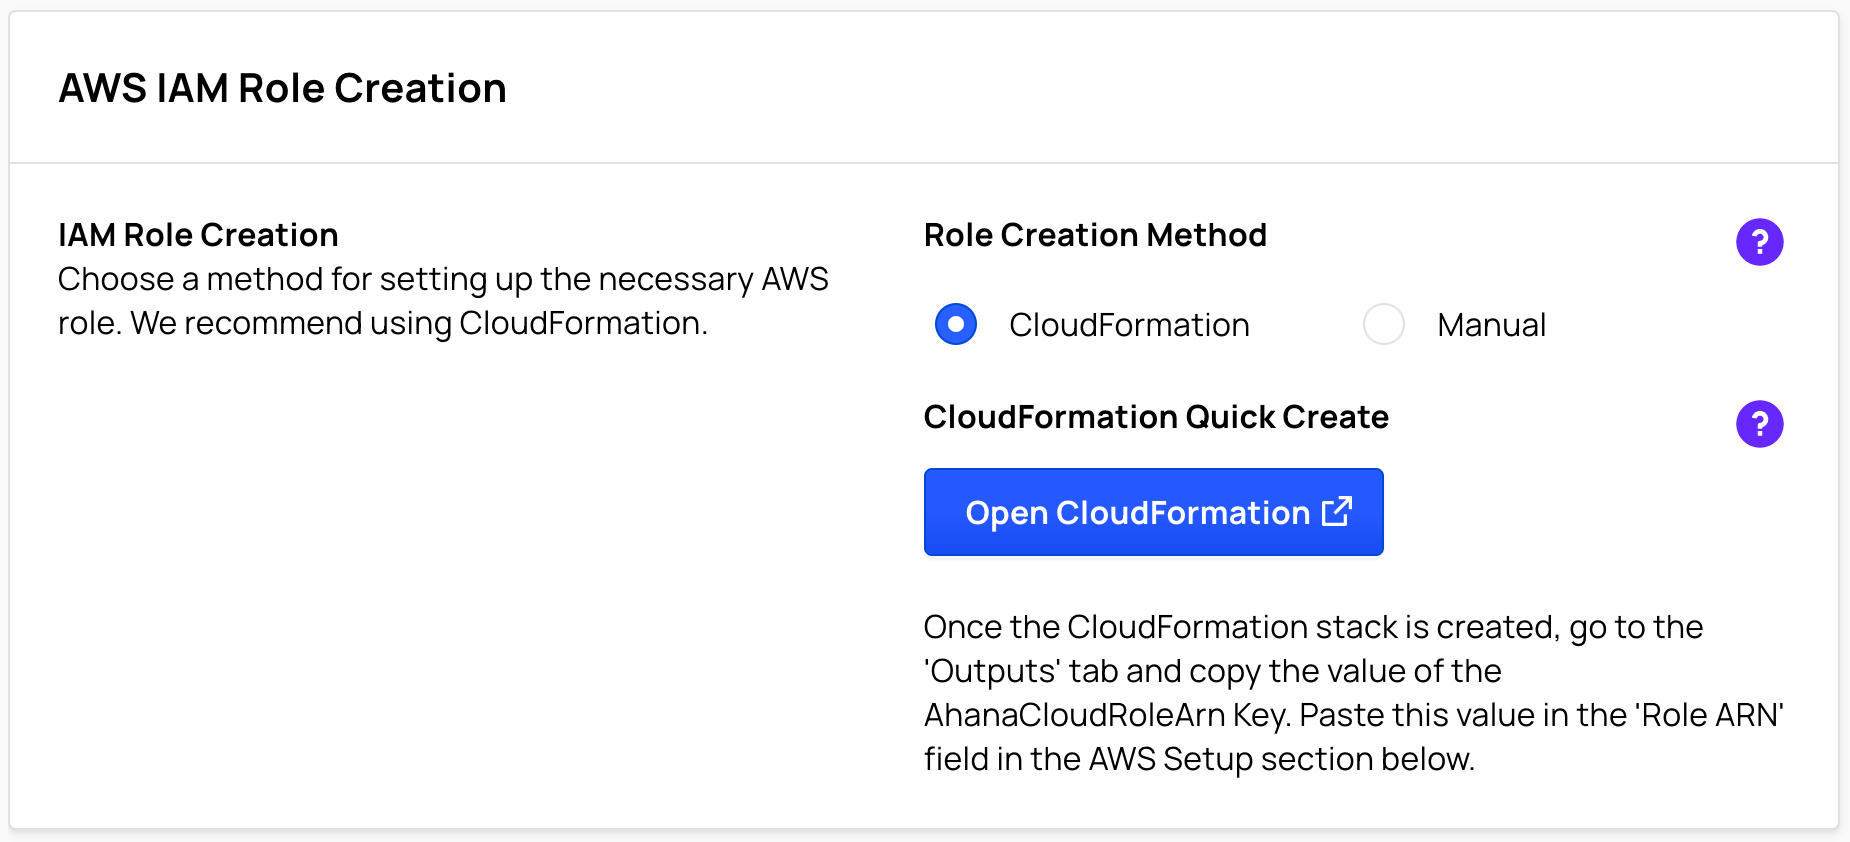
Select CloudFormation.
Select Open CloudFormation.
Login to the AWS console. The Quick create stack page displays.
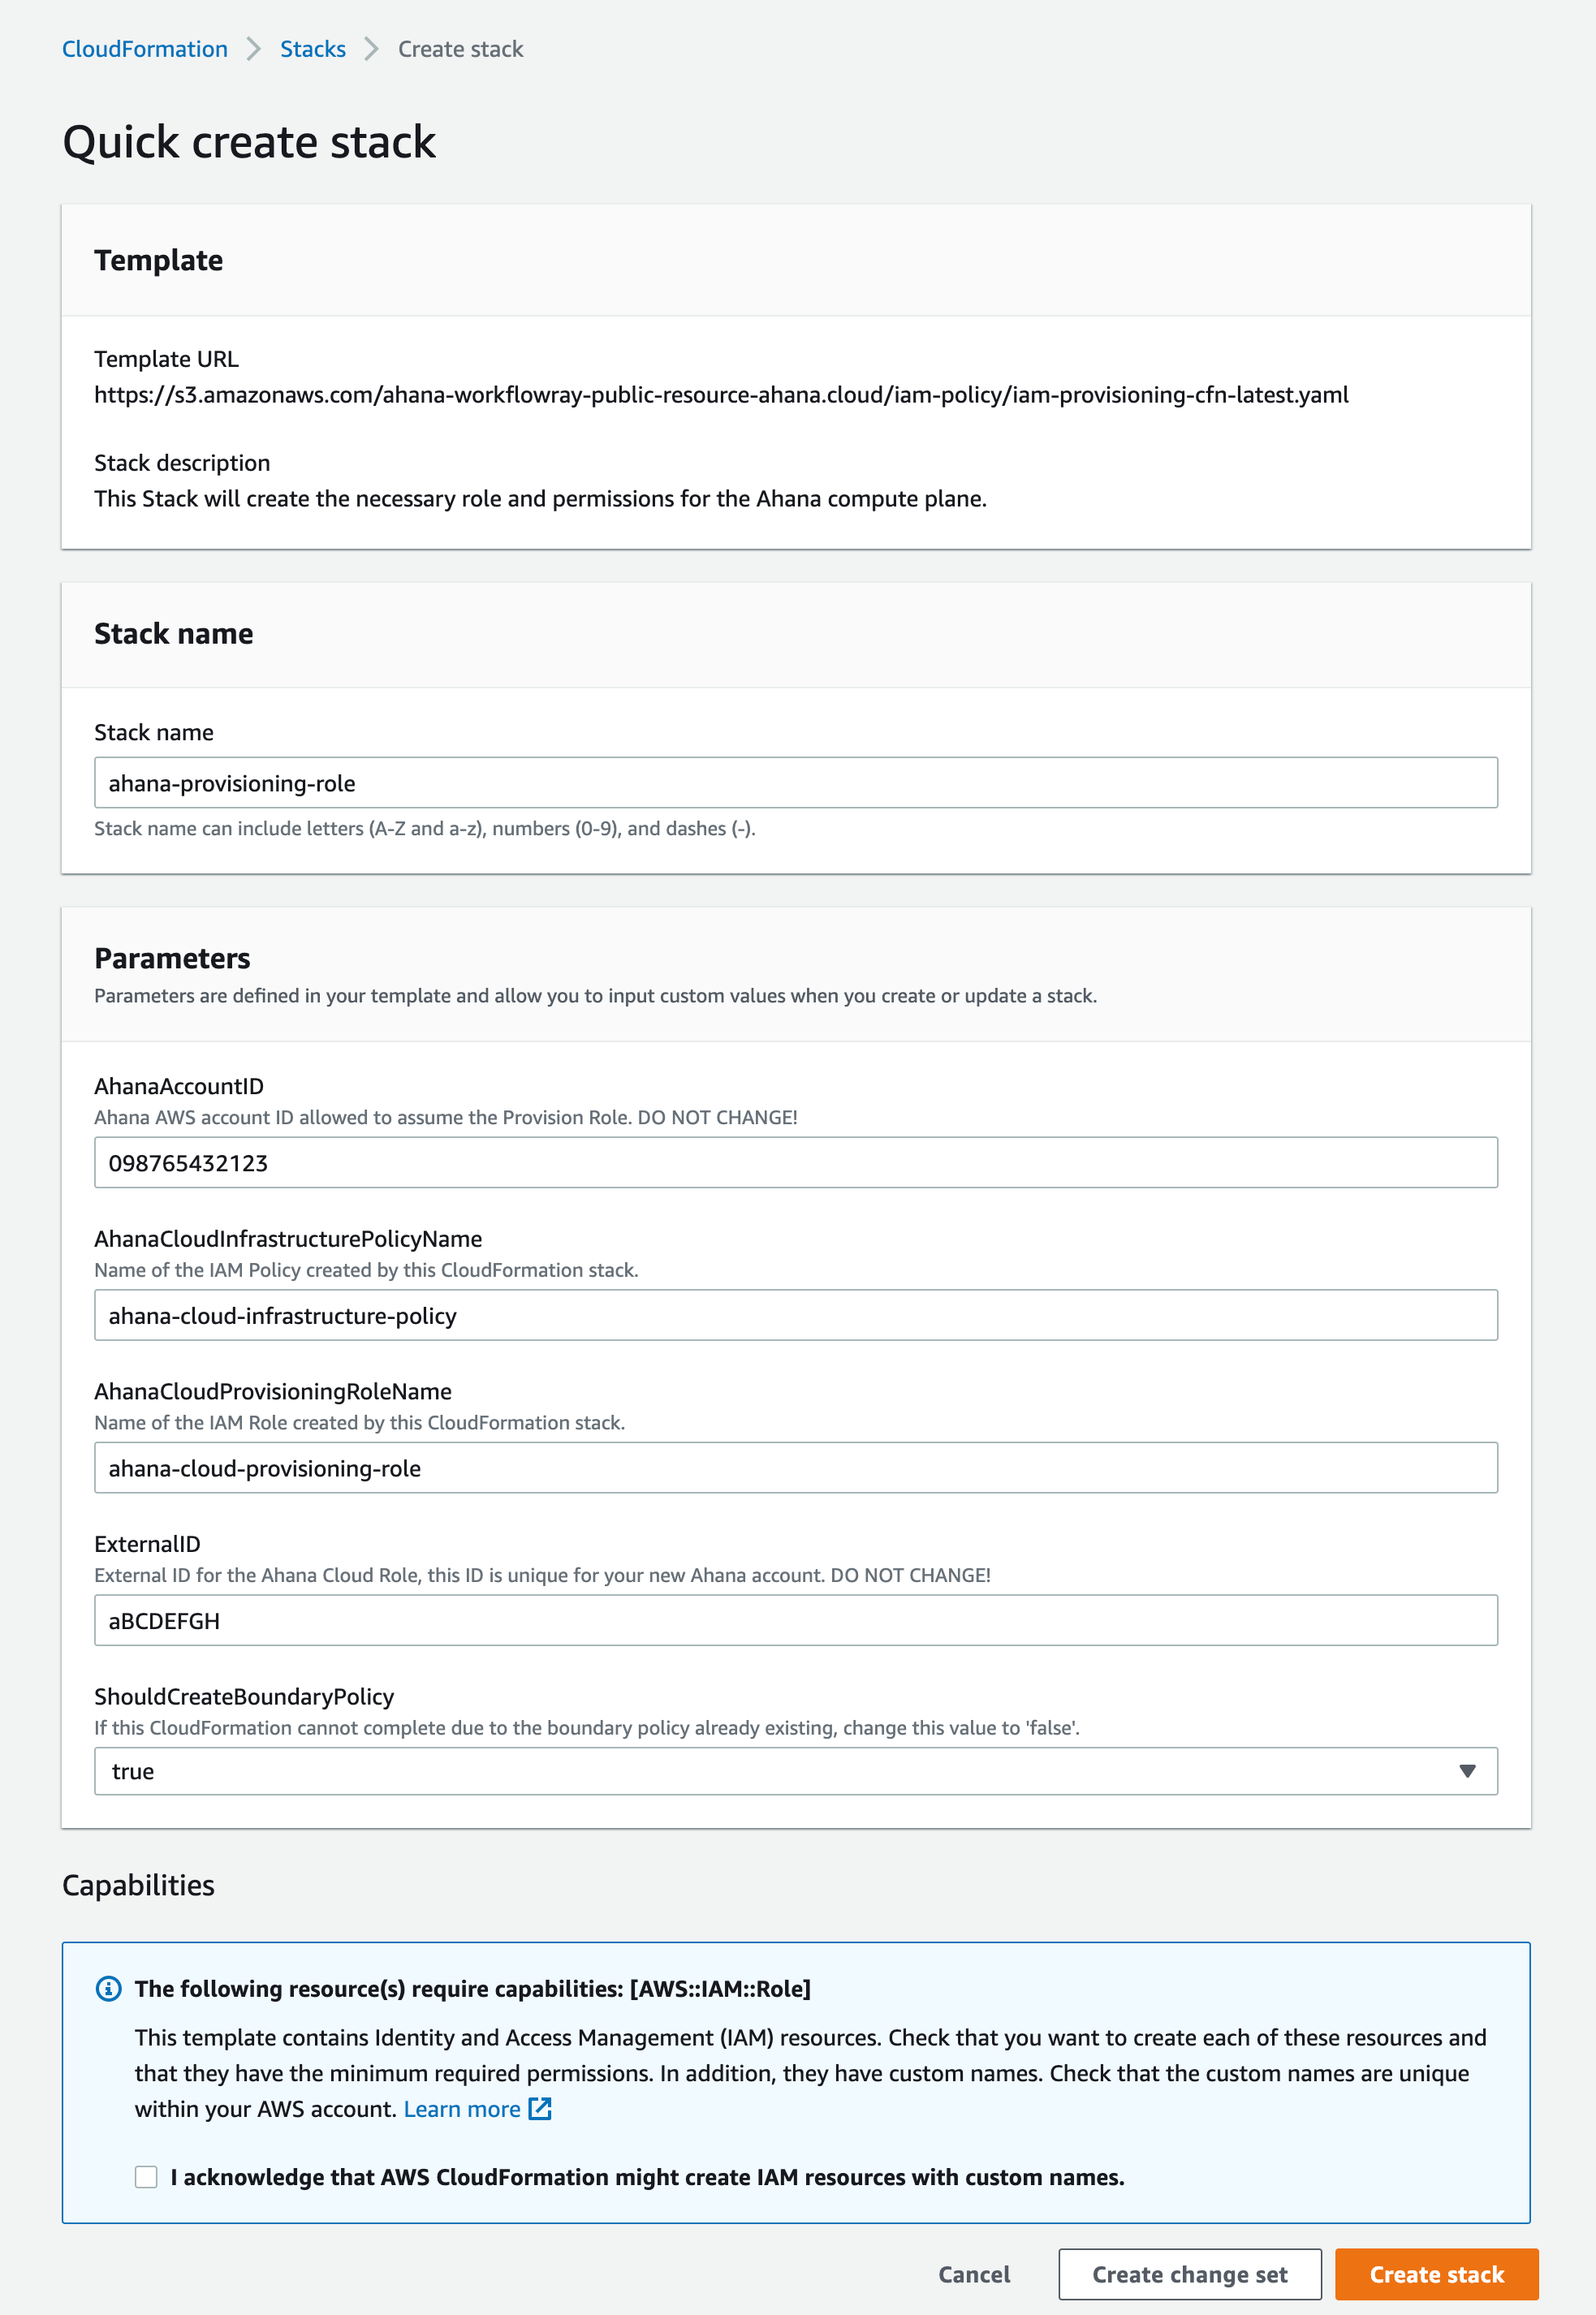
Select I acknowledge that AWS CloudFormation might create IAM resources with custom names.
Select Create stack.
Provide Ahana with the AWS IAM Role ARN
In AWS CloudFormation, select Stacks, then select the stack that you created.
Select Outputs.
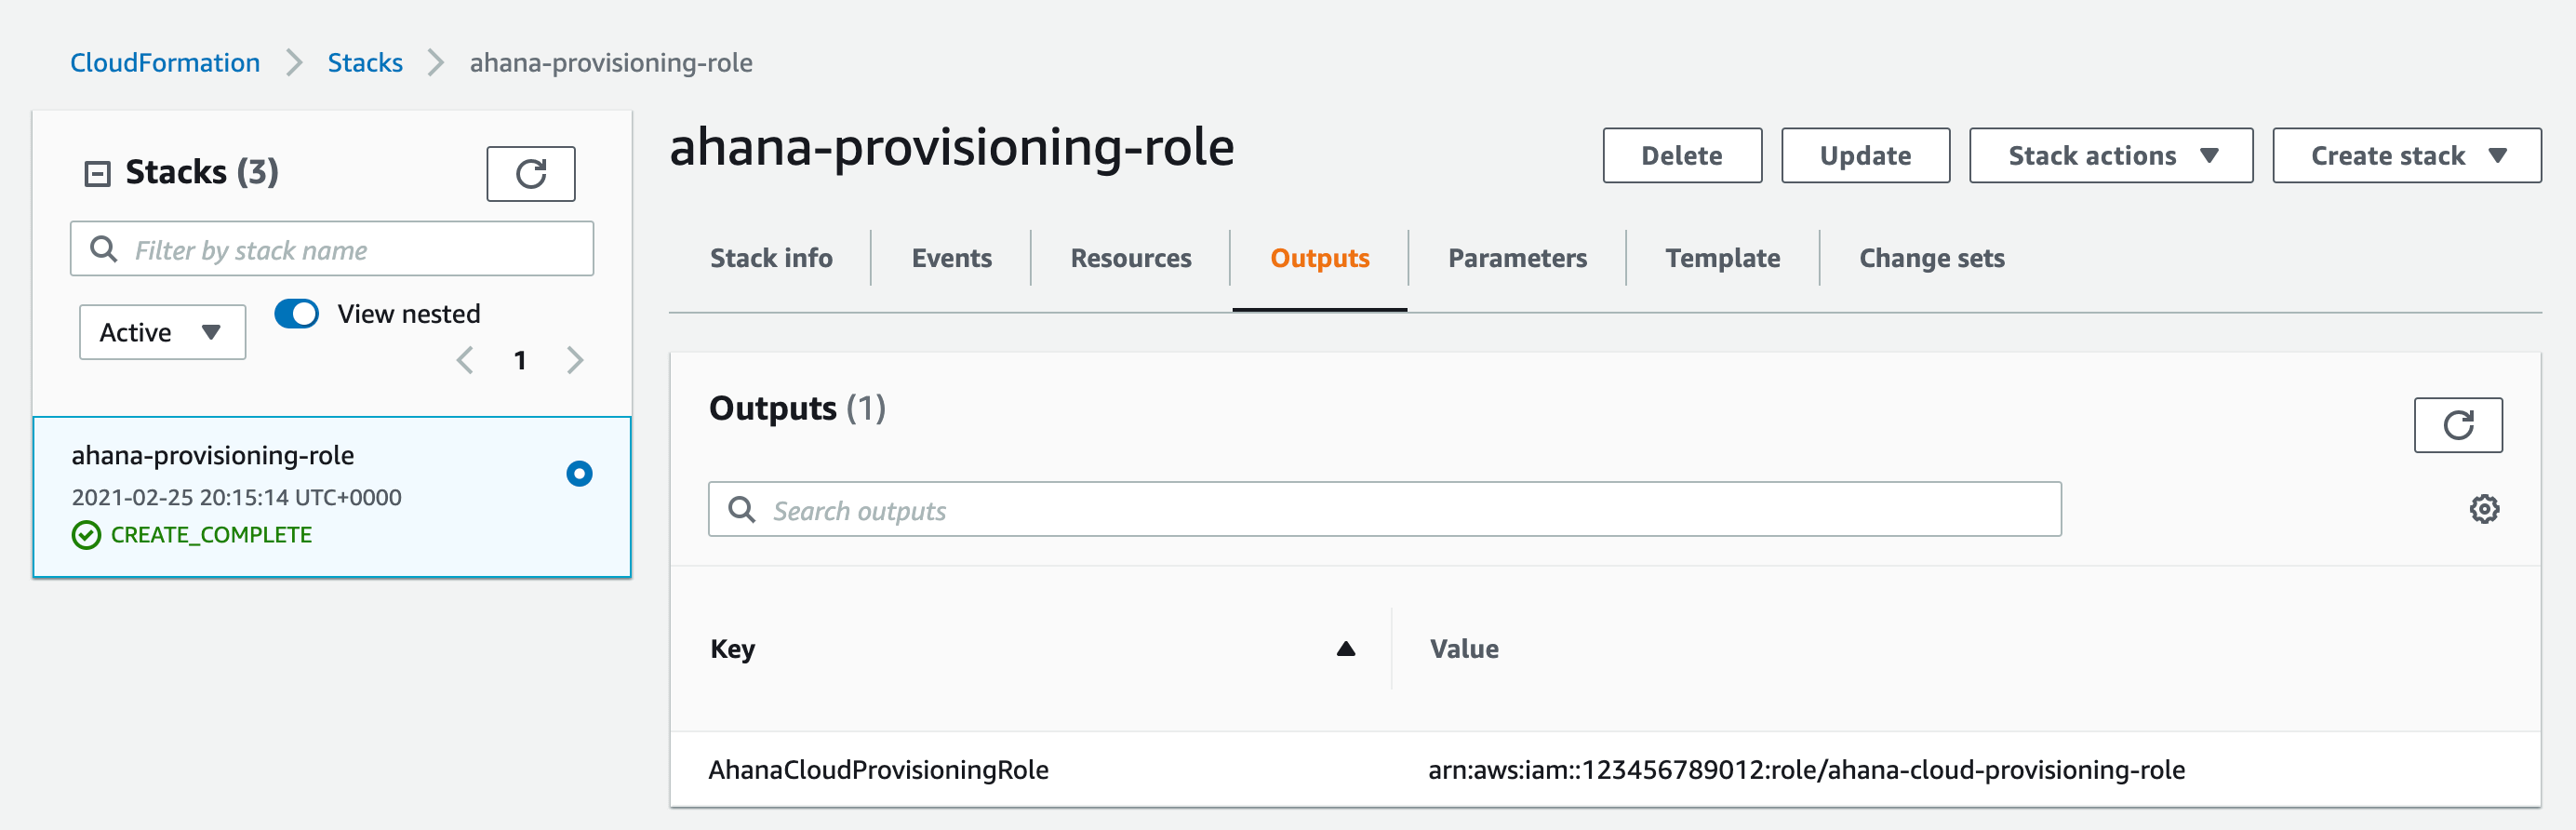
Copy the complete Value. The value is similar to
arn:aws:iam::123456789012:role/ahana-cloud-provisioning-role.In Ahana, enter the value copied from AWS in Role ARN.
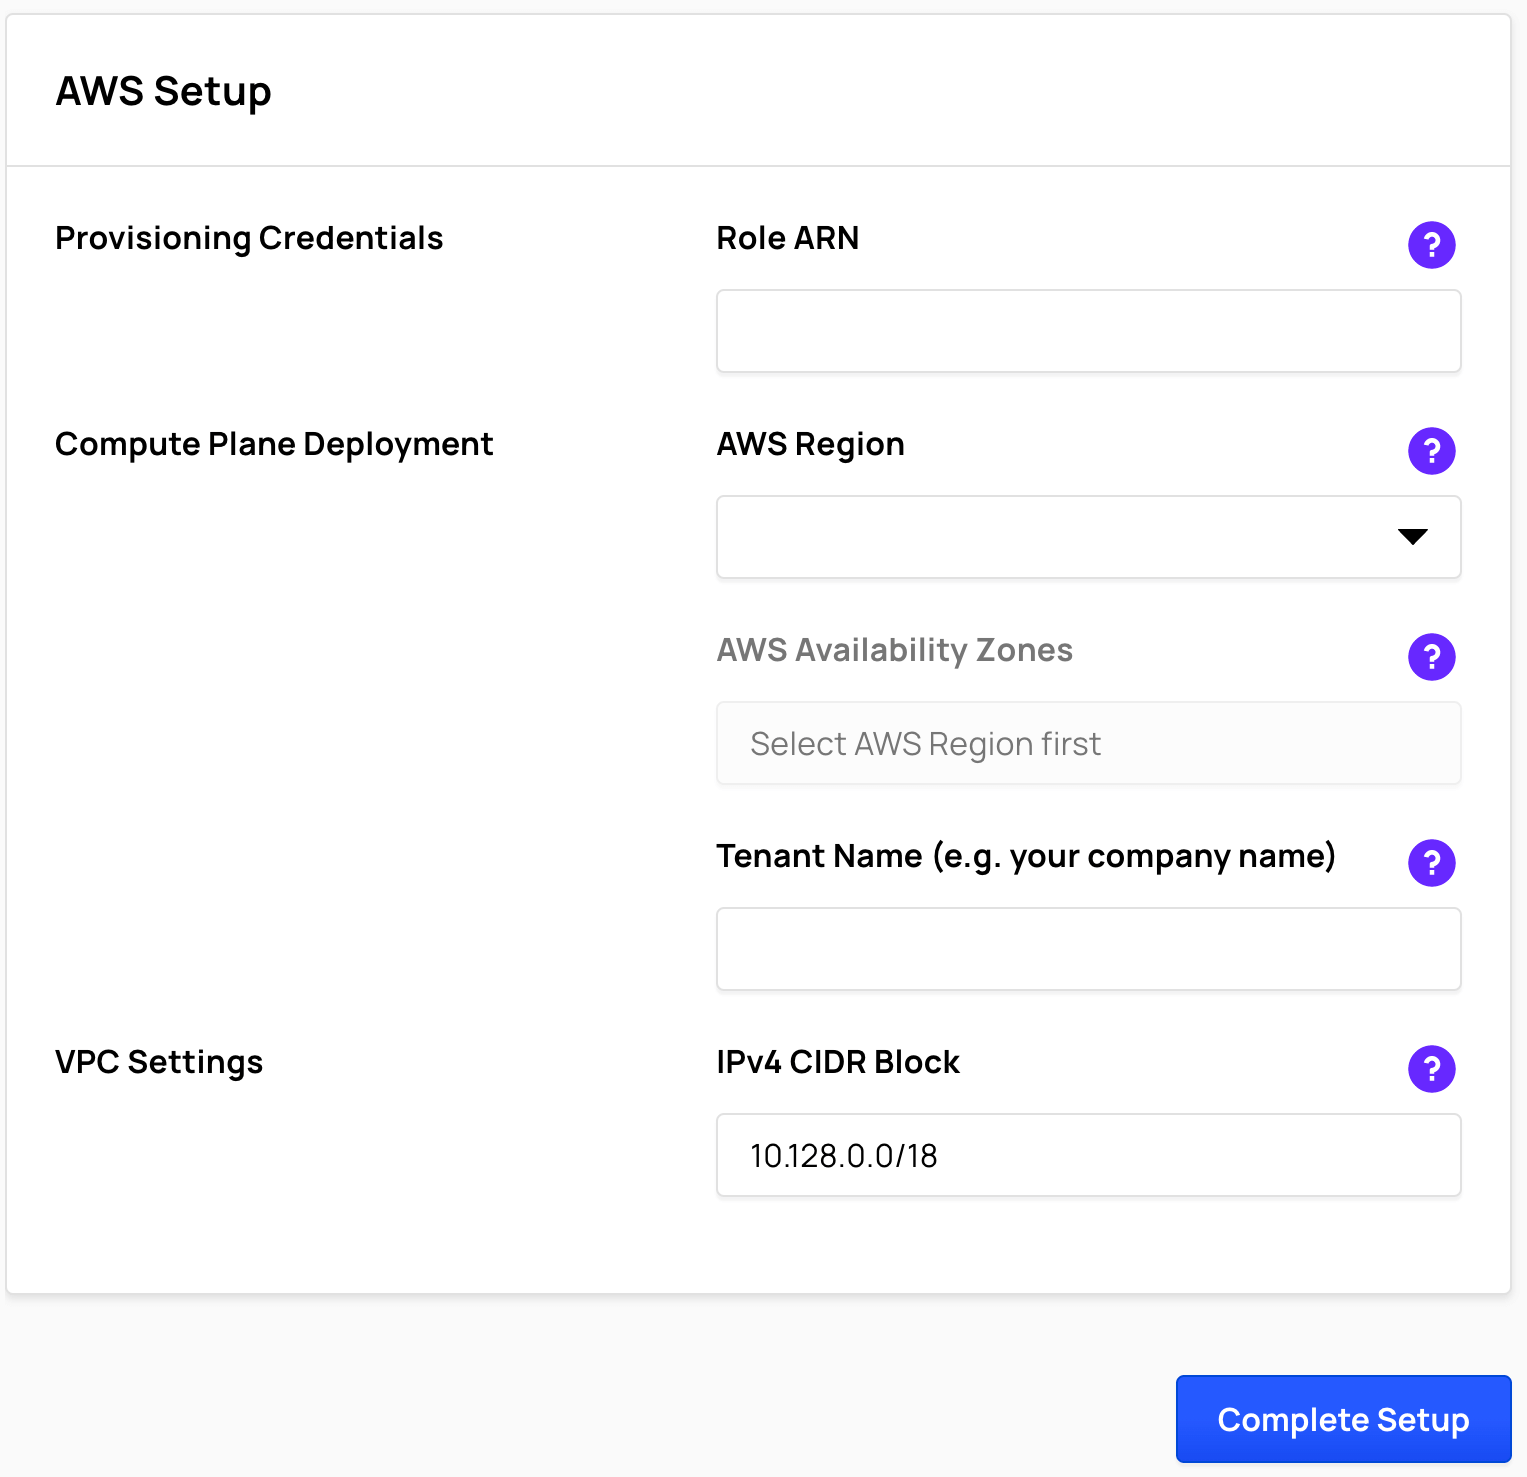
Complete the Compute Plane Setup
- In Ahana, select the AWS Region where you want to provision the Compute Plane. Only one Compute Plane may be created in an AWS Region for each Ahana account.
tip
It is recommended to select the AWS region where your data sources are located so that the compute and storage are co-located to reduce AWS data transfer costs.
Choose 2 or 3 AWS Availability Zones in the selected AWS Region. The Compute Plane uses Amazon EKS (Kubernetes) which is created by default across availability zones for high availability.
Enter a Tenant Name that will be used to provide access to resources created in your Compute Plane.
- Valid characters in Tenant Names are lowercase letters (a-z), numbers (0-9), and hyphens (-).
- The Tenant Name must begin and end with a lowercase character (a-z) or a number (0-9).
- The maximum length is 63 characters.
- Uppercase letters (A-Z), underscores (_), and other special characters such as !, @, #, $ are not valid characters in a Tenant Name.
- The Tenant Name cannot be changed after the Compute Plane is provisioned.
IPv4 CIDR Block defines the IP address range for the Compute Plane, formatted in Classless Inter-Domain Routing (CIDR) Block format.
If you need a different amount of IPv4 addresses than the default /18 netmask provides, you can change the block size to another block size between /16 and /24.
- The CIDR block size cannot be changed after the Compute Plane is provisioned.
- The CIDR block cannot overlap with another VPC CIDR block in the same region.
To create the Ahana Compute Plane, select Complete Setup, then select Confirm.

It takes between 20 and 40 minutes to provison the Compute Plane, depending on the AWS region.
When complete, Ahana sends an email to the email address used to register the Ahana account about the successful provisioning, and the Ahana SaaS Console updates.